Ubuntu Server 16.04, also named Xenial Xerus, has been released by Canonical and it’s now ready for installation.
The details about this new LTS version can be found on the previous article: How to upgrade Ubuntu 15.10 to 16.04.
This topic will guide you on how you can install Ubuntu 16.04 Server Edition with Long Time Support on your machine.
If you’re looking for Desktop Edition, read our previous article: Installation of Ubuntu 16.04 Desktop
RequirementsUbuntu 16.04 Server ISO ImageInstall Ubuntu 16.04 Server Edition1. On the first step visit the above link and download the latest version of Ubuntu Server ISO image on your computer.
Once the image download completes, burn it to a CD or create a bootable USB disk using Unbootin (for BIOS machines) or Rufus (for UEFI machines).
2. Place the bootable media intro the appropriate drive, start-up the machine and instruct the BIOS/UEFI by pressing a special function key (F2, F11, F12) to boot-up from the inserted USB/CD drive.
In a few seconds you will be presented with the first screen of Ubuntu installer. Select your language to perform the installation and hit Enter key to move to the next screen.
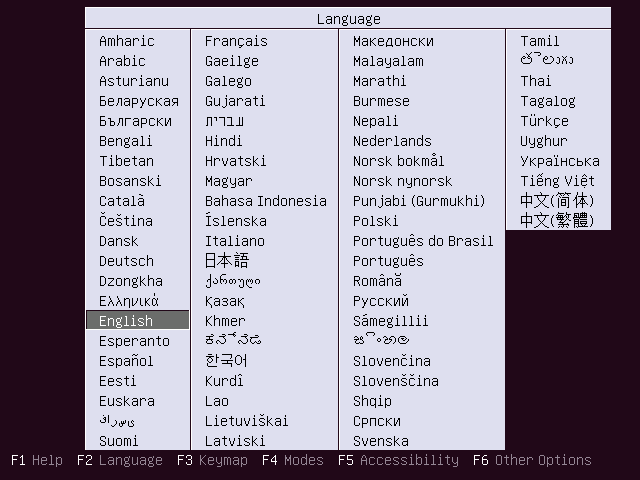
Choose Ubuntu 16.04 Server Installation Language
3. Next, select the first option, Install Ubuntu Server and press Enter key to continue.
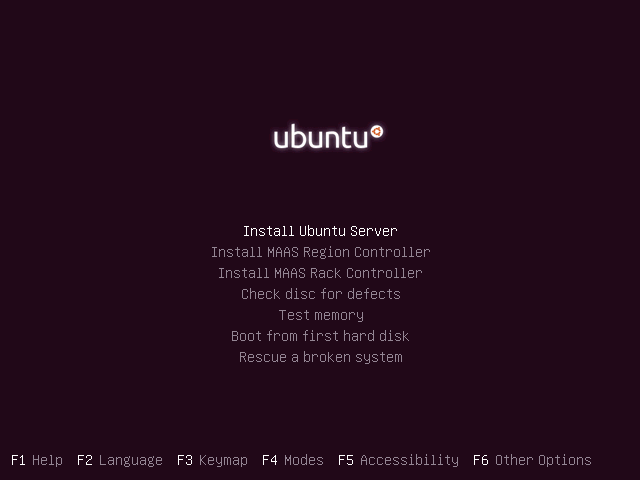
Install Ubuntu 16.04 Server
4. Select the language you with to install the system and press Enter again to continue further.
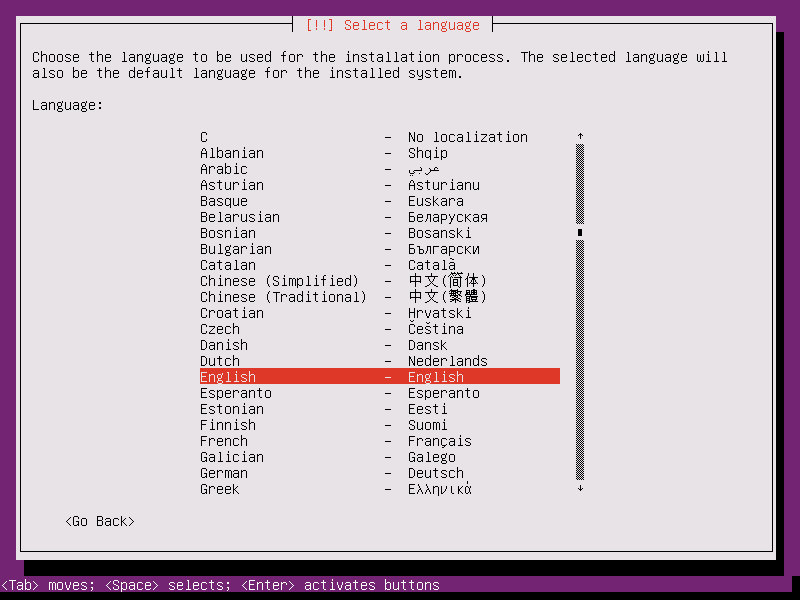
Select Language for Ubuntu 16.04 Server
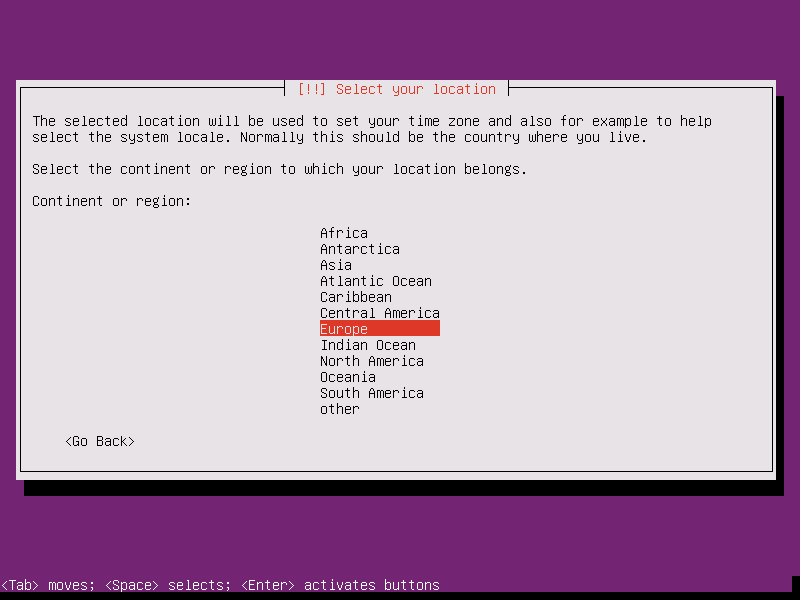
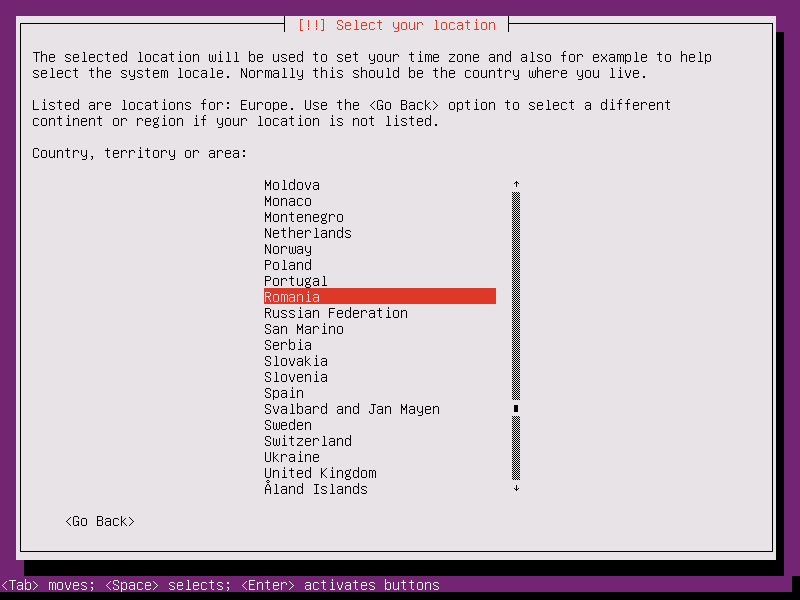
5. On the next series of screen choose your physical location from the presented list. If your location is different than the ones offered on the first screen, select other and hit Enter key, then select the location based on your continent and country. This location will be also used by the timezone system variable. Use the below screenshots as a guide.
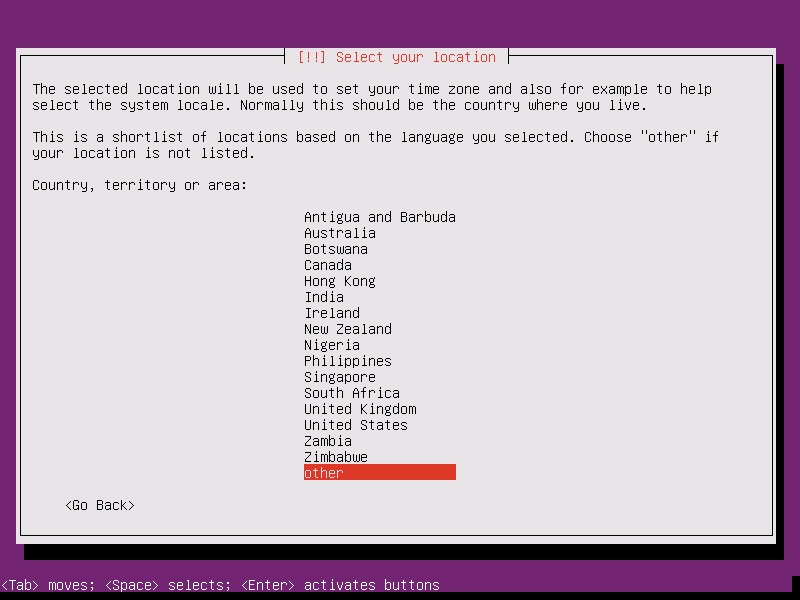
Choose Location for Ubuntu 16.04 Server
Select Country Region
Select Area Location
6. Assign the locales and keyboard settings for your system as illustrated below and hit Enter to continue the installation setup.
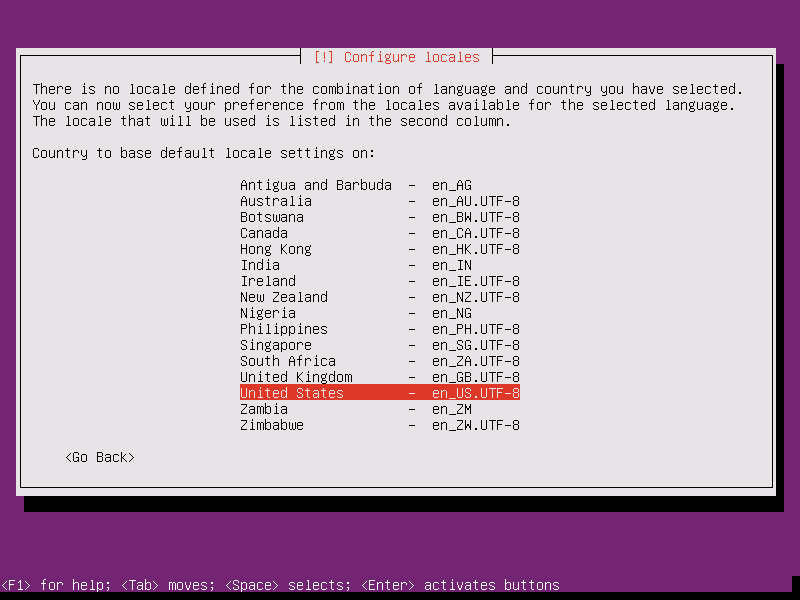
Configure Locales
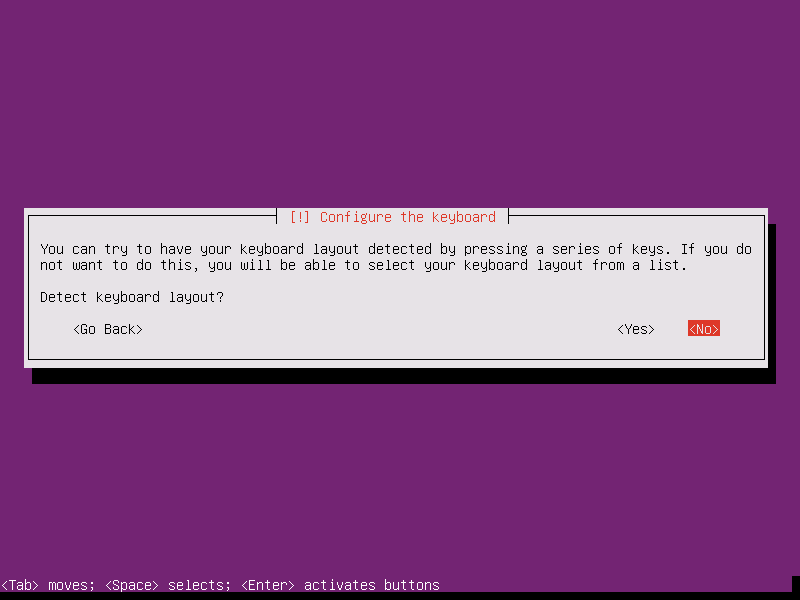
Configure Keyboard Layout
7. The installer will load a series of additional components required for the next steps and will automatically configure your network settings in case you have a DHCP server on the LAN.
Because this installation is intended for a server it’s a good idea to setup a static IP address for your network interface.
To do this you can interrupt the automatic network configuration process by pressing on Cancel or once the installer reaches hostname phase you can hit on Go Back and choose to Configure network manually.
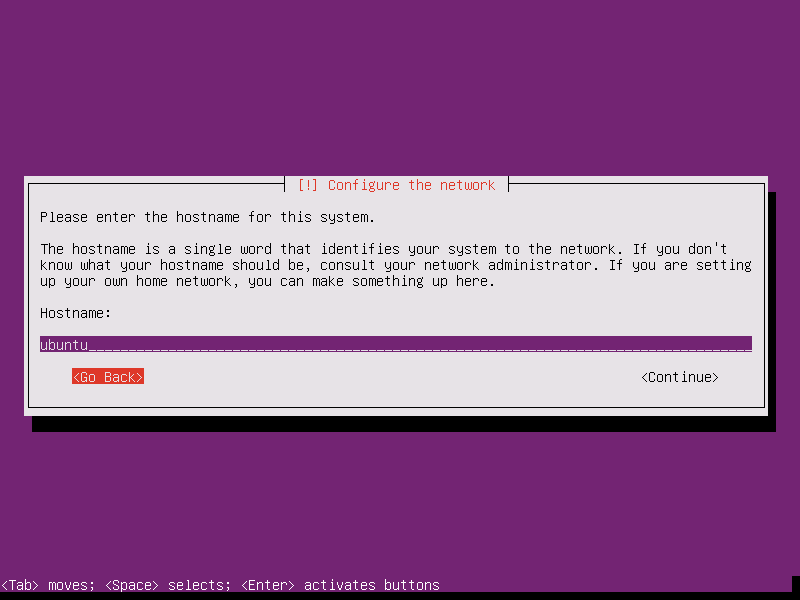
Set Ubuntu 16.04 Hostname
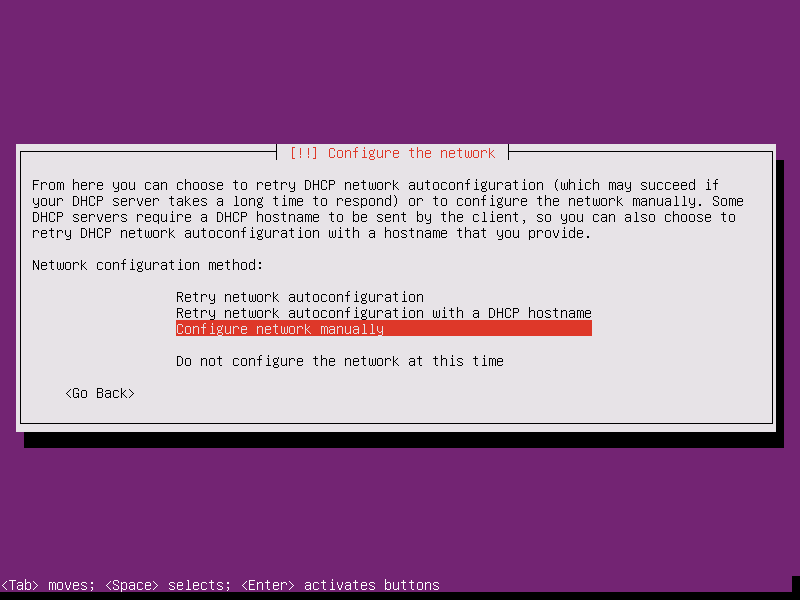
Configure Network Manually
8. Enter your network settings accordingly (IP Address, netmask, gateway and at least two DNS nameservers) as illustrated on the below images.
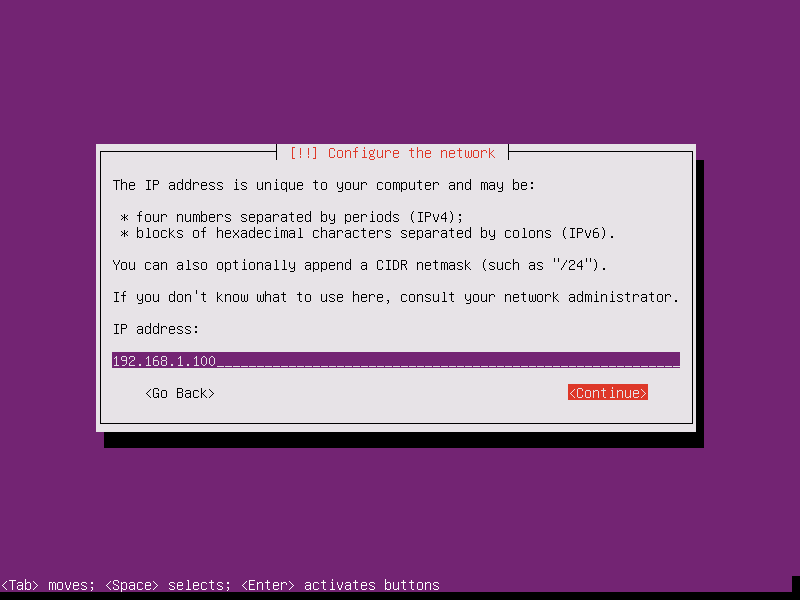
Set Static IP Address on Ubuntu 16.04
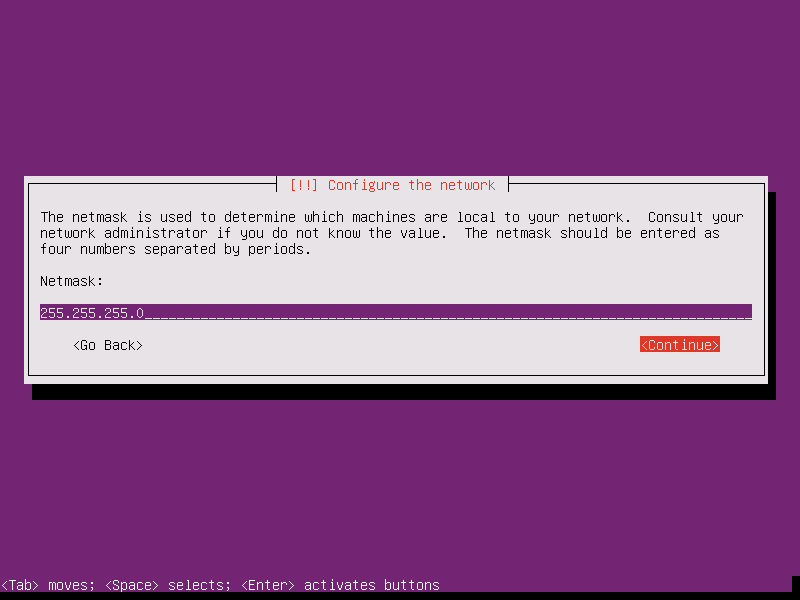
Configure Network Mask for Ubuntu 16.04
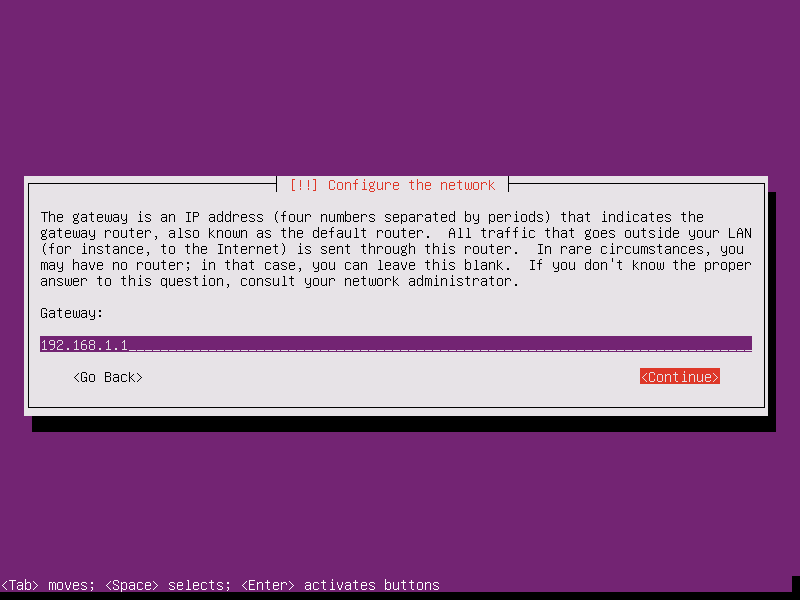
Configure Network Gateway for Ubuntu 16.04
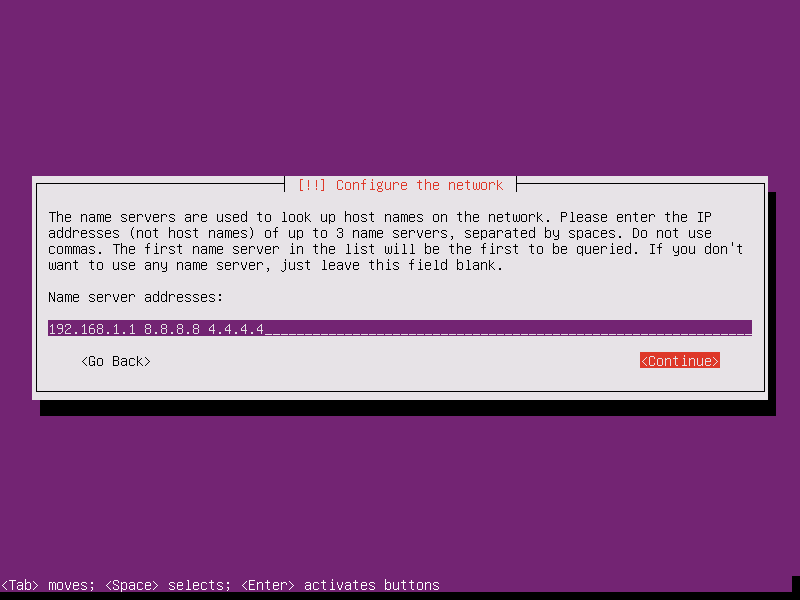
Configure Network DNS on Ubuntu 16.04
9. On the next step setup a descriptive hostname for your machine and a domain (not necessary required) and hit on Continue to move to the next screen. This step concludes the network settings.

Set Ubuntu 16.04 Server Hostname
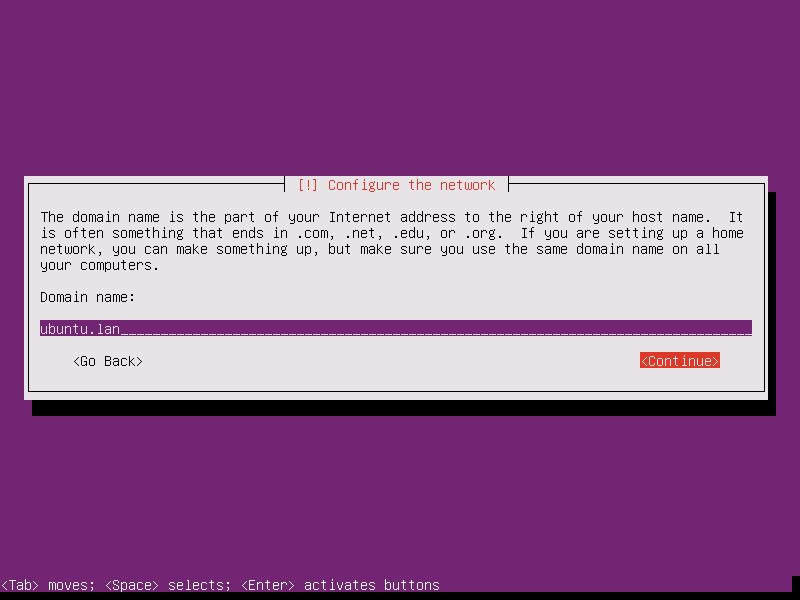
Set Ubuntu 16.04 Domain Name
10. On this step the installer prompts you to setup a username and a password for your system. This username will be granted by the system with sudo powers, so, technically, this user will be the supreme administrator next to root account (which is disabled by default).
Thus, choose an inspired username, maybe hard to guess for security reasons, with a strong password and hit on Continue. Choose not to encrypt your home directory and press Enter to continue further.
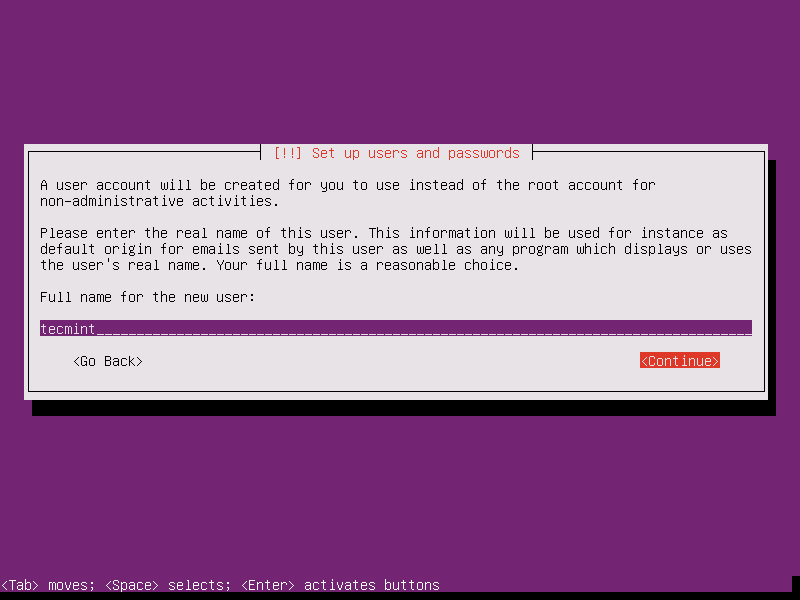
Setup User and Password
11. Next, the installer will automatically set your clock based on the physical location configured earlier. In case the location is correctly chosen hit on Yes to continue to disk partition layout.
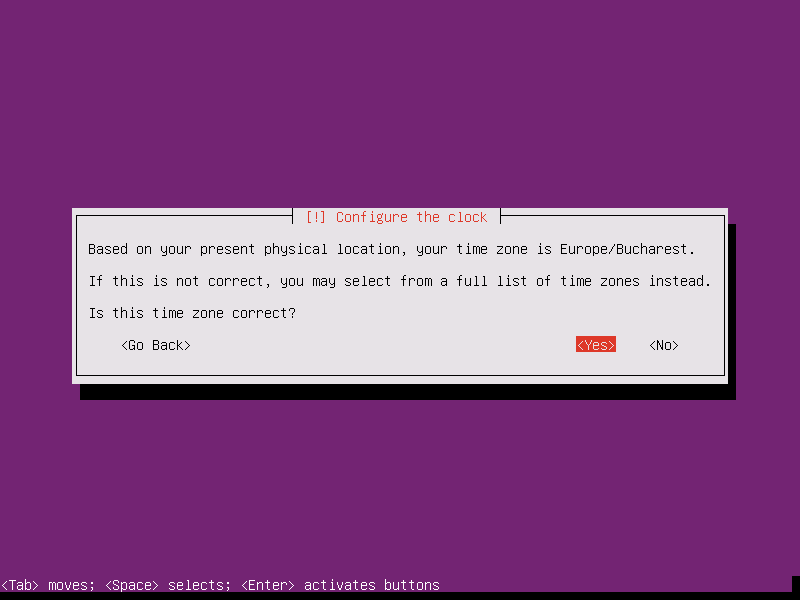
Configure System Clock
12. On the next step you can choose the method that will be used to slice up your disk. For instance, if you need to create custom partition scheme (such as /home, /var, /boot etc) choose Manual method.
For a general purpose server you can stick to Guided with LVM method as illustrated below, which automatically creates the partitions on your behalf.
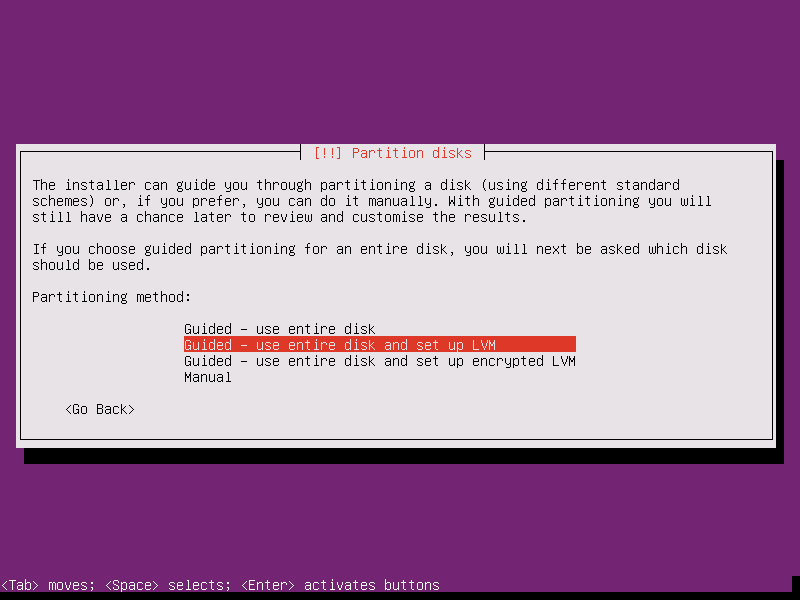
Select Partition Method
13. Next, select the disk that will be used by the installer to create partitions and press Enter key.

Select Disk Partition
14. Answer with Yes at the next screen in order to commit changes to disk with LVM scheme and hit on Continue to use the entire disk space for guided partitions.
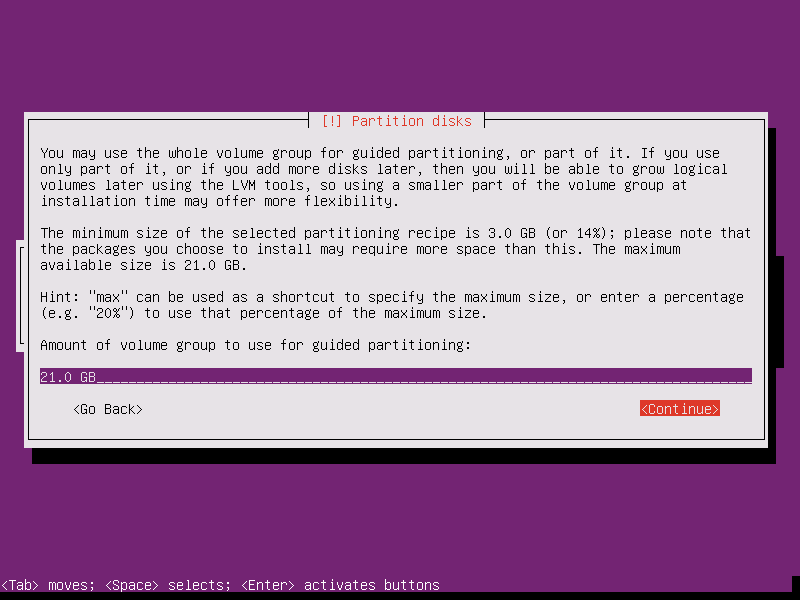
Add Disk Partition Size

Confirm Disk Partition Changes
15. Finally, approve for the last time the changes to be written to disk by pressing on Yes and the installation will now begin. From this step on all the changes will be committed to disk.
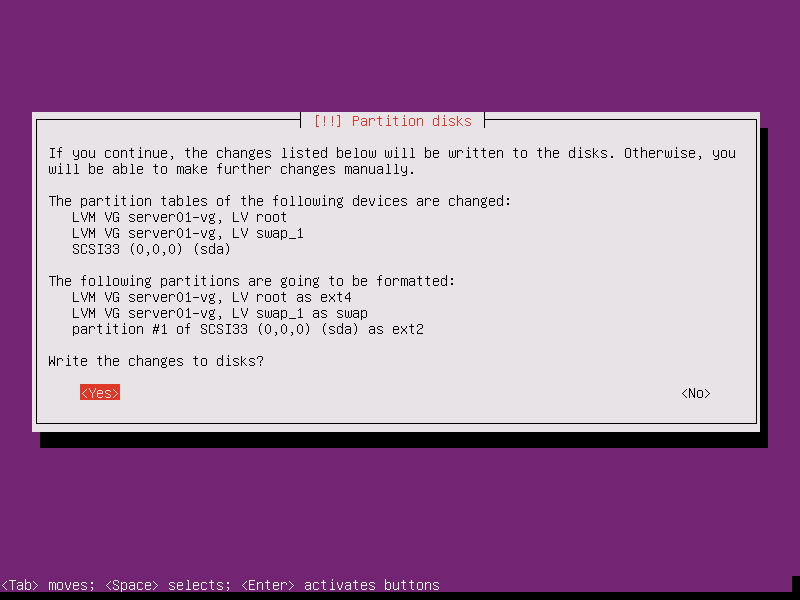
Confirm Disk Partition Changes
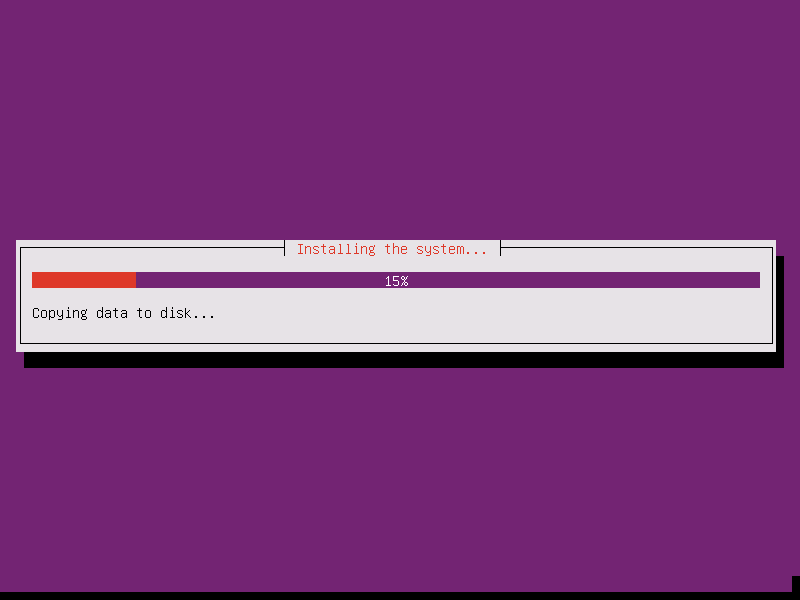
Installing Ubuntu 16.04 Server
16. In case your system is behind a proxy or a firewall use the next screen to bypass the network restrictions, otherwise just leave it black and hit on Continue.
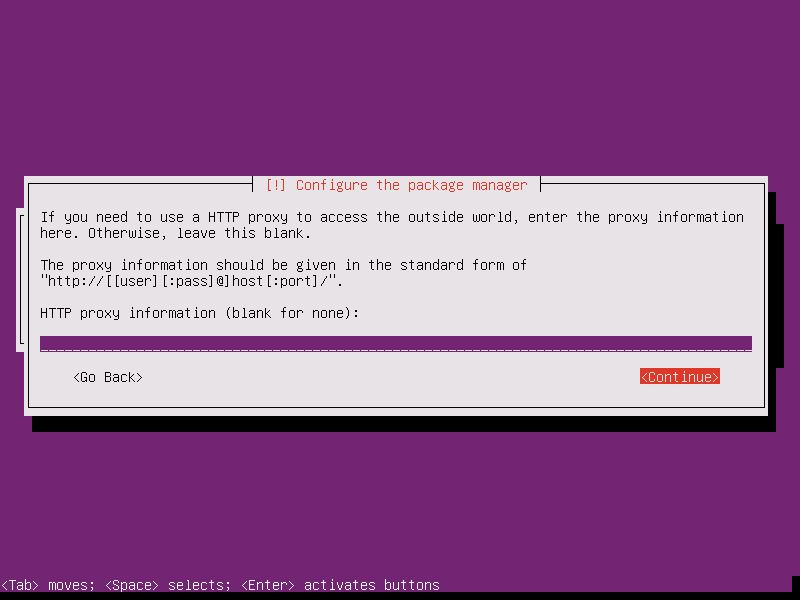
Configure System Package Manager
17. Next, the installer will configure apt repositories and will install the selected software. After it finishes the installation tasks a new screen will appear which will ask you how to manage the upgrade process. Select No automatic updates for now (you will manually select what updates are necessary) and hit Enter key to continue.
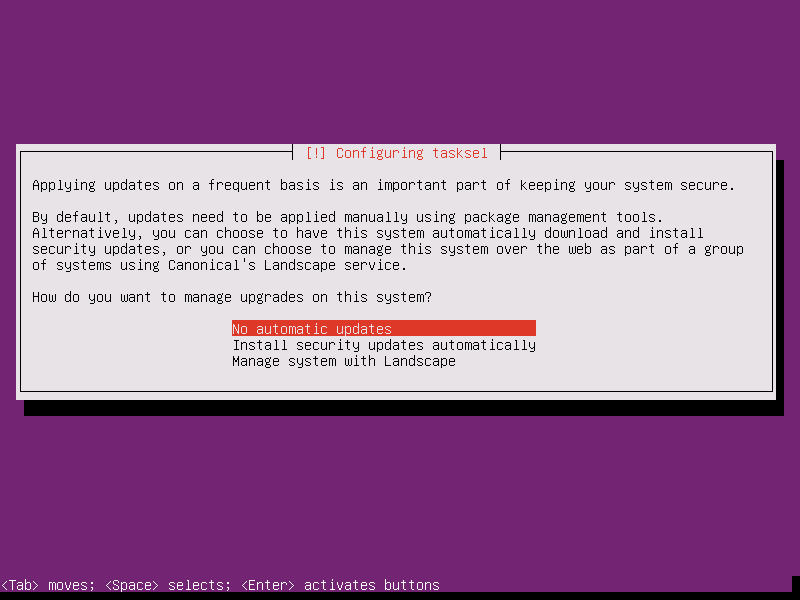
Manage Ubuntu 16.04 Upgrades
18. On the next step you will be asked to select what software to install. Select only standard system utilities and OpenSSH server (if you require remote access) by pressing the spacebar key and hit on Continue.
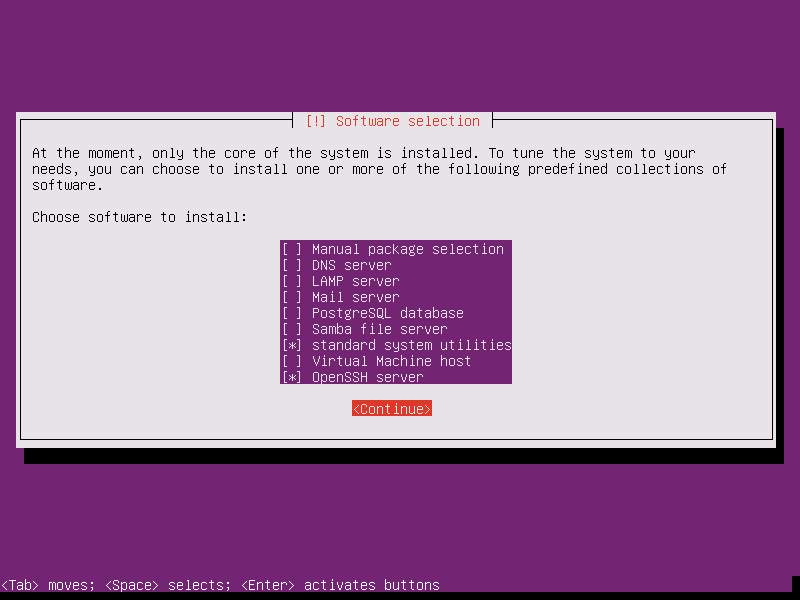
System Software Selection
19. Once the installer finishes installing the software, a new screen will prompt you whether to install the Grub boot loader to hard disk MBR (first 512 byte sector). Obviously without the GRUB you can’t boot up your system after restart, so hit on Yes to continue with the installation.
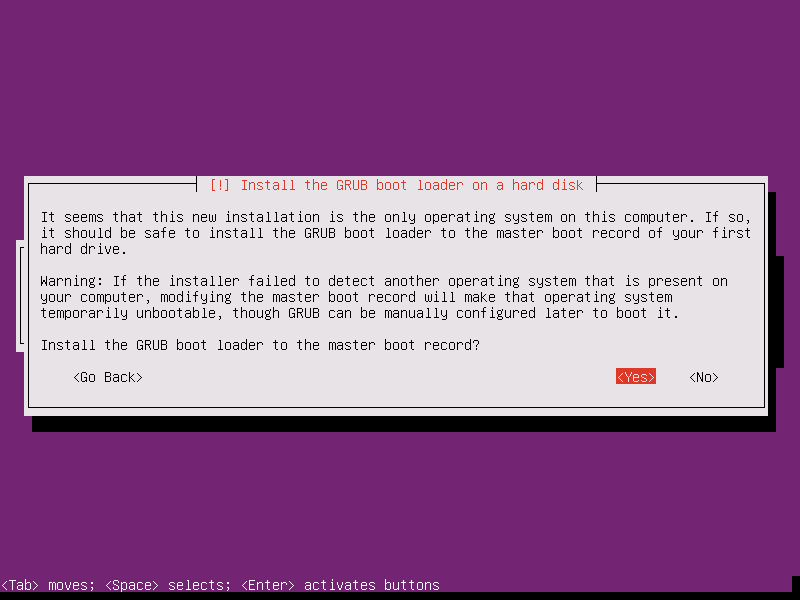
Install Grub Boot Loader
20. Finally, after the boot loader is written to Hard Disk MBR, the installation process finishes. Hit on Continue to reboot the machine and remove the installation media.
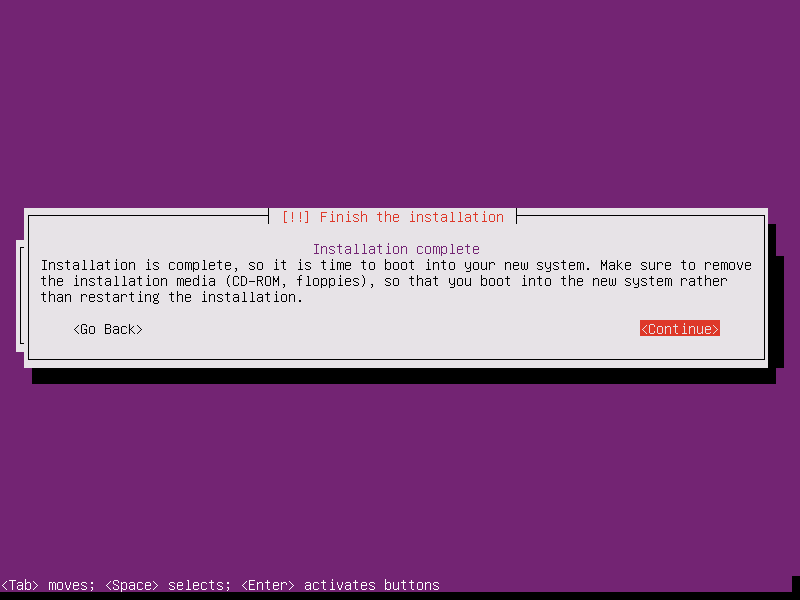
Finish Ubuntu 16.04 Server Installation
21. After reboot, login to your system console using the credentials configured during the installation process and you’re good to go on production with your server.

Ubuntu 16.04 Server Login Prompt
That’s all! Keep in mind that this version of Ubuntu has official maintenance support from Canonical until 2021 for hardware, bugs, software and security updates.
新聞熱點


疑難解答
圖片精選